Organic Manures & Bio Inputs
Manures are plant and animal wastes that are used as sources of plant nutrients. They release nutrients after their decomposition.
Major sources of manures are:
- Cattle shed wastes – dung, urine and slurry from biogas plants
- Poultry jitter, droppings of sheep and goat
- Slaughterhouse wastes -bone meal, meat meal, blood meal, horn and hoof meal, Fish wastes
- Byproducts of agro industries-oil cakes, bagasse and press mud, fruit and vegetable processing wastes etc
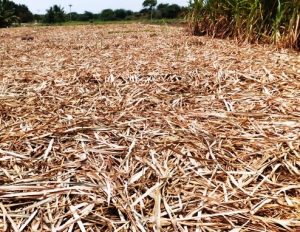
- Crop wastes – sugarcane trash, stubbles and other related material
- Water hyacinth, weeds and tank silt
- Green manure crops and green leaf manuring material
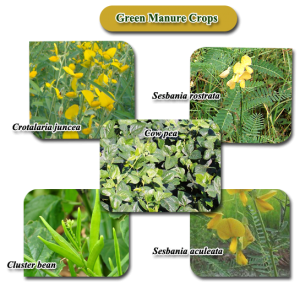
Green Manure
Green undecomposed material used as manure is called green manure.
It is obtained in two ways: by growing green manure crops or by collecting green leaf (along with twigs) from plants grown in wastelands, field bunds and forest.
Green manuring is growing in the field plants usually belonging to leguminous family and incorporating into the soil after sufficient growth.
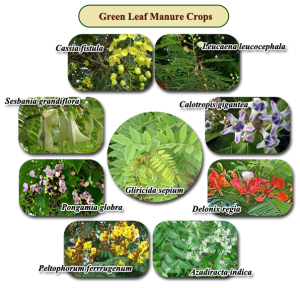
Green Leaf Manure
Application of green leaves and twigs of trees, shrubs and herbs collected from elsewhere is known as green leaf manuring.
Forest tree leaves are the main sources for green leaf manure. Plants growing in wastelands, field bunds etc., are another source of green leaf manure.
Advantages
- Green manuring improves soil structure, increases water holding capacity and decreases soil loss by erosion.
- Growing of green manure crops in the off season reduces weed proliferation and weed growth.
- Green manuring helps in reclamation of alkaline soils. Root knot nematodes can be controlled by green manuring.
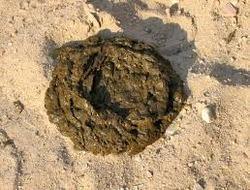
Farmyard Manure
Farmyard manure refers to the decomposed mixture of dung and urine of farm animals along with litter and left over material from roughages or fodder fed to the cattle.
On an average well decomposed farmyard manure contains 0.5 per cent N, 0.2 per cent P2O5 and 0.5 per cent K2O.
Preparation:
- Trenches of size 6 m to 7.5 m length, 1.5 m to 2.0 m width and 1.0 m deep are dug.
- All available litter and refuse is mixed with soil and spread in the shed so as to absorb urine.
- The next morning, urine soaked refuse along with dung is collected and placed in the trench.
- When the section is filled up to a height of 45 cm to 60 cm above the ground level, the top of the heap is made into a dome and plastered with cow dung earth slurry.
- The manure becomes ready for use in about four to five months after plastering.
Application:
- Partially rotten farmyard manure has to be applied three to four weeks before sowing while well rotten manure can be applied immediately before sowing.
- Generally 10 to 20 t/ha is applied, but more than 20 t/ha is applied to fodder grasses and vegetables. In such cases farmyard manure should be applied at least 15 days in advance to avoid immobilization of nitrogen.
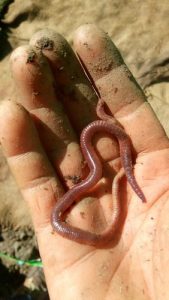
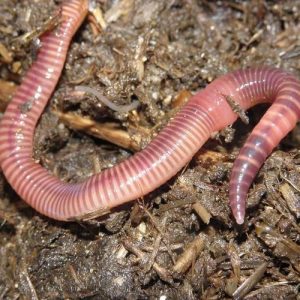
Vermicompost and its utilization
Vermicomposting is the process of turning organic debris into worm castings.
The worm castings are very important to the fertility of the soil. The castings contain high amounts of nitrogen, potassium, phosphorus, calcium, and magnesium.
Vermicompost is nothing but the excreta of earthworms, which is rich in humus and nutrients.
Nutritive value of Vermicompost
Organic Carbon | : | 9.5 – 17.98% |
Nitrogen | : | 0.5 – 1.50% |
Phosphorous | : | 0.1 – 0.30% |
Potassium | : | 0.15 – 0.56% |
Sodium | : | 0.06 – 0.30% |
Calcium and Magnesium | : | 22.67 to 47.60 meq/100g |
Copper | : | 2 – 9.50 mg kg-1 |
Iron | : | 2 – 9.30 mg kg-1 |
Zinc | : | 5.70 – 11.50 mg kg-1 |
Sulphur | : | 128 – 548 mg kg-1 |
Vermicompost Production Methodology
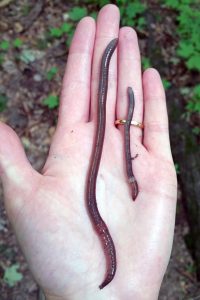
i) Selection of suitable earthworm
For vermicompost production, the surface dwelling earthworm alone should be used.
The African earthworm (Eudrillus engenial), Red worms (Eisenia foetida) and Composting worm (Peronyx excavatus) are promising worms used for vermicompost production.
All the three worms can be mixed together for vermicompost production.
African earthworm (Eudrillus euginiae) |
Tiger worm or Red wrinkle (Eisenia foetida) |
(Perinonyx ecavatus) |
ii) Selection of site for vermicompost production
Vermicompost can be produced in any place with shade and high humidity.
Abandoned cattle shed or poultry shed or unused buildings can be used.
If it is to be produced in open area, shady place is selected. A thatched roof may be provided to protect the process from direct sunlight and rain.
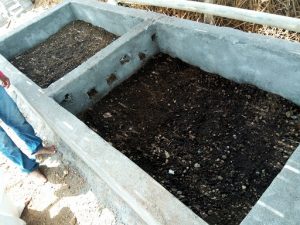
iii) Containers for vermicompost production
A cement tub or temporary beds may be constructed to a height of 2½ feet and a breadth of 3 feet. The length may be fixed to any level depending upon the size of the room.
The bottom of the tub is made to slope like structure to drain the excess water from vermicompost unit
Vermicompost can also be prepared in wooden boxes, plastic buckets or in any containers with a drain hole at the bottom.

iv) Vermiculture bed
Vermiculture bed or worm bed (3 cm) can be prepared by placing after saw dust or husk or coir waste or sugarcane trash in the bottom of tub / container.
Coir waste Saw dust Sugarcane trash
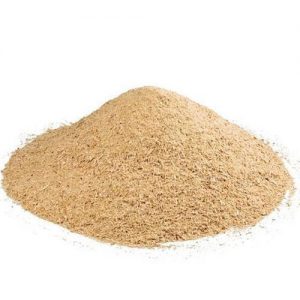
A layer of fine sand (3 cm) should be spread over the culture bed followed by a layer of garden soil (3 cm). All layers must be moistened with water.
v) Selection for vermicompost production
Cattle dung (except pig, poultry and goat), farm wastes, crop residues, vegetable market waste, flower market waste, agro industrial waste, fruit market waste and all other bio degradable waste are suitable for vermicompost production.
The cattle dung should be dried in open sunlight before used for vermicompost production.
All other waste should be predigested with cow dung for twenty days before put into vermibed for composting.
vi) Putting the waste in the container
The predigested waste waste is placed into the tub / container upto brim.
Over this material, the selected earthworm is placed uniformly. For one-meter length, one-meter breadth and 0.5-meter height, 1 kg of worm (1000 Nos.) is required.
vii) Watering the vermibed
Daily watering is not required for vermibed. But 60% moisture should be maintained throughout the period.
Watering should be stopped before the harvest of vermicompost.
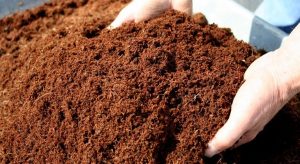
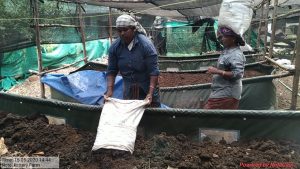
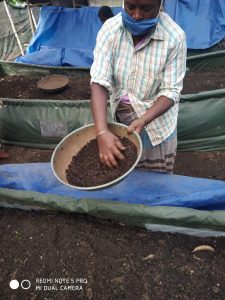
viii) Harvesting vermicompost
After 45 days, the castings formed on the top layer are collected. Sieved in 4 mm sieve and packed.
The collection may be carried out once in a week thereafter.
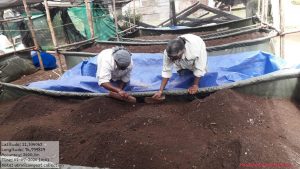
Collection of Vermicompost
Panchagavya
Panchagavya, an organic product has the potential to play the role of promoting growth and providing immunity in plant system.
Ingredients | |||
Cow Dung |
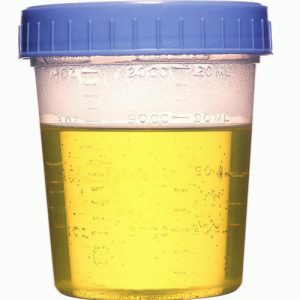
Cow Urine |
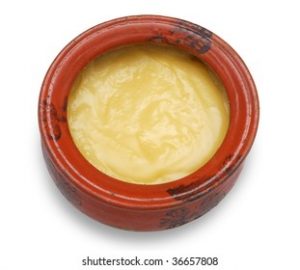
Cow Ghee | |
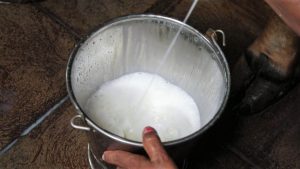
Cow Milk |
| ||
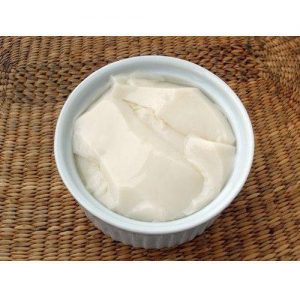 Cow Curd
Other materials required for mixing:
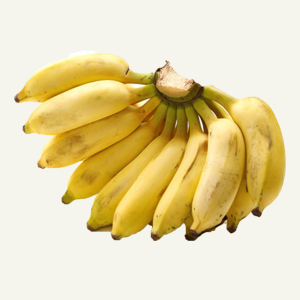
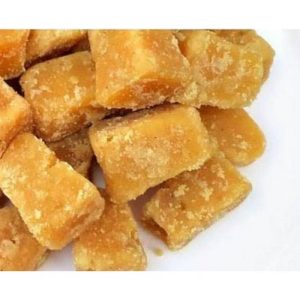
Water Well ripened Jaggery Tender Coconut Poovan Banana Water |
Panchagavya Preparation – For 50 litres
Step 1:
Mix 1 Kg of Cow ghee with 7 Kg of Cow dung. Mix the two ingredients thoroughly in a drum both in morning and evening hours and keep it for 3 days. The container should be kept under shade.
Step 2:
After 3 days add and mix cow urine – 10 liters and water – 10 liters and keep it for 15 days with regular mixing both in morning and evening hours.
Step 3:
1) Jaggery – 3 Kg; 2) Red ripened poovan banana – 12 nos; 3) Tender coconut water – 3 liters; 4) Cow curd – 2 liters; 5) Cow milk – 3 liters
After 15 days, add the above ingredients and mix thoroughly
Step 4:
After 30 days, the solution is filtered and canned. Panchagavya is ready for use
Physico chemical and biological properties of Panchagavya
|
| |||||||||||||||||||||||||||||||||||||||||||||||||||
Physico-chemical properties of Panchagavya revealed that they possess almost all the major nutrients, micro nutrients and growth hormones (IAA & GA) required for crop growth.
Lactobacillus produces various beneficial metabolites such as organic acids, hydrogen peroxide and antibiotics, which are effective against other pathogenic microorganisms besides its growth.
Recommended Dosage
Spray system
3% solution was found to be most effective. Three litres of Panchagavya in 100 litres of water is ideal for all crops. The power sprayers of 10 litres capacity may need 300 ml/tank. When sprayed with power sprayer, sediments are to be filtered and when sprayed with hand operated sprayers, the nozzle with higher pore size has to be used.
Flow system
The solution of Panchagavya can be mixed with irrigation water at 50 litres per hectare either through drip irrigation or flow irrigation
Seed/seedling treatment
3% solution of Panchagavya can be used to soak the seeds or dip the seedlings before planting. Soaking for 20 minutes is sufficient.
Seed storage
3% of Panchagavya solution can be used to dip the seeds before drying and storing them.
Periodicity
Pre flowering phase | : | Once in 15 days, two sprays depending upon duration of crops |
Flowering and pod setting stage | Once in 10 days, two sprays | |
| Fruit/Pod maturation stage | Once during pod maturation |
Dasagavya, is an organic preparation made from ten products in the form of panchagavya and certain plant extracts.
“Gavya” is the term given to cow’s products comprising of cow dung, cow urine, cow’s milk, curd and ghee, which have miraculous effects on plant growth when suitably mixed.
Preparation of Dasagavya
Plant Ingredients required:
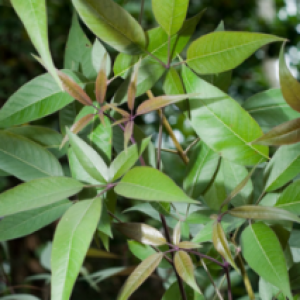
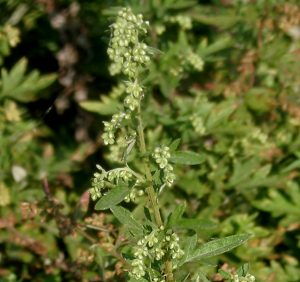
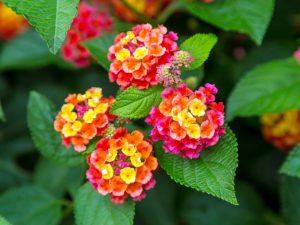
Vitex negundo Artemisis nilagirica Lantana camera
(Nochi) (Marikolundhu) (Unni Chedi)
Leucas aspera Adathoda vasica
(Thumbai)
Step 1: The plant extracts are prepared by separately soaking the foliage in cow urine in 1:1 ratio (1 kg chopped leaves in 1 litre cow urine) for ten days.
Step 2: The filtered extracts of all the plants are then added @ 1 litre each to 5 litre of the panchagavya solution.
Step 3: The mixture is kept for 25 days and stirred well, meanwhile, to ensure thorough mixing of panchagavya and the plant extracts. After 25 days, the mixture is filtered, canned and is ready for use.
Mode of use
The Dasagavya solution is filtered to avoid clogging of sprayer nozzles and is recommended as foliar spray at 3 % concentration.
Soaking of seeds or dipping the roots of seedlings in 3 % solution of dasagavya for 20 minutes before planting enhances seed germination and root development.
Periodicity
Weekly sprays during crop growth for all vegetables and plantation crops.
Advantages
- Increases growth, yield and quality of the crops
- Controls pests like aphids, thrips, mites and other sucking pests
- Controls diseases like leaf spot, leaf blight, powdery mildew etc.
Effect of dasagavya on hill crop pests and diseases
Rose
Spraying 3 % dasagavya in rose controls thrips and powdery mildew.
Gerbera
Dasagavya as foliar spray is effective against gerbera powdery mildew.
Tea
Regular spraying of 3 % dasagavya at 15 days interval is effective against blister blight disease
Jeevamrutha is a low budget preparation that makes the soil enriched, aids the growth of micro organisms and improves mineralization of the soil.
The fungal infections and tick burning are effectively kept under control by Jeevamrutha.
Preparation of Jeevamrutham
For preparation of Jeevamrutham, a 200-liter tank or a water barrel is required.
- Add 10 kg of cow dung into the tank containing water. With the help of a stick, stir the mixture in clockwise direction.
- Add a handful of fertile soil from your farm into the mixture.
- Then add 10 liters of cow urine to the mixture. Stir it well again in clockwise direction.
- Finally, add the semi powdered jiggery (1 Kg) and flour (2 Kg) into the mixture.
- The above mixture should be kept in a shaded place, away from sunlight.
- The mixture should be stirred thrice a day (10 min every day) for 4 days.
- Cover the water barrel or tank with a breathable jute bag.
- After the fermentation process is completed, the Jeevamrutham is ready for use.
- This Jeevamrutham can be used for 2-3days. Do not use after seven days.
Jeevamrutham Irrigation and Dosage
Jeevamrutham can be used in irrigation through drip, canal water 0r sprinkler.
- First dosage – 30 days after sowing. In 100 liters of water add 5 liters of filtered Jeevamurtham. Stir it well and spray it to one acre of Vegetable Crops.
- Second dosage –21 days after first spray. In 150 liters of water add 10 liters of filtered Jeevamrutham and spray.
- Third dosage – 21 days after second spray. In 200 liters of water add 20 liters of filtered Jeevamrutham and spray.
- Fourth dosage – Fruit bearing stage. In 200 liters of water and add 6 liters and spray it for one acre.